Philips Hue - Basic Knowledge
6 January 2022 - Reading time: 6 minutes
I thought it would be better to just create a topic of the basic knowledge for the Philips Hue bridge.
otherwise I'm keep explaining in each manual how to create a user, control a sensor trough JSON etc.
So on this page the basic knowledge of the Philips Hue explained,
so the rest of the manuals can focus on creating and controlling the devices.
Table of Contents
Finding your Philips Hue Hub
so at first we need to know to find your Philips Hue in your local network.
this can be done by checking your router or by browsing to the following website: https://discovery.meethue.com
you will see an simular result as the following value:
[{"id":"ecb5fa0000000000","internalipaddress":"192.168.0.10","port":443}]this would mean that your internal IP Address is: 192.168.0.10
so, to doublecheck this you can browse to the given IP address ( https://192.168.0.10 )
and you should see a website like this:
if you see this page you have successfully found your Philips Hue
another way to find your Philips Hue Device is trough an IP scanner
you can use for example the tool Advanced IP scanner
this tool doesn't need installation. (just run is possible)
just enter your IP range (for example 192.168.0.0-255) (this will scan the range 192.168.0.0 ~ 192.168.0.255)
and search for the manufacturer Philips Lightning BV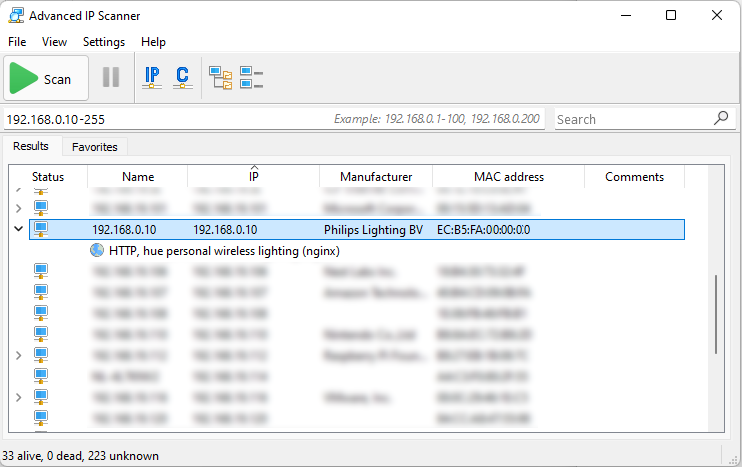
Creating an User
Now that we know the IP address, lets create a username for your Fibaro system:
to do so we can use the Philips Hue Hub CLIP API Debugger
this debugger is located on the Hub itself, (you already know the IP Address)
if you go to the following page: http://yourhubIP/debug/clip.html (in my example: http://192.168.0.10/debug/clip.html )
and you will see the following page: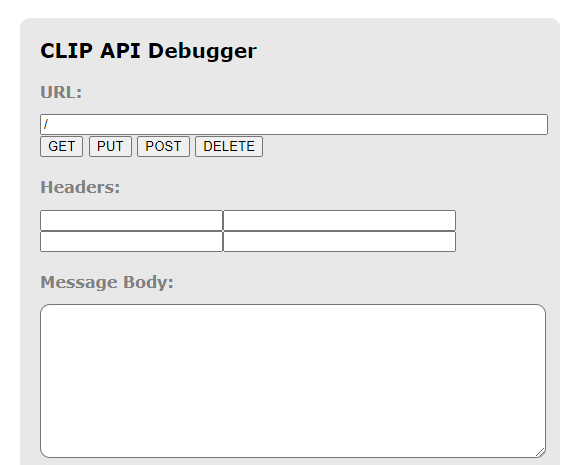
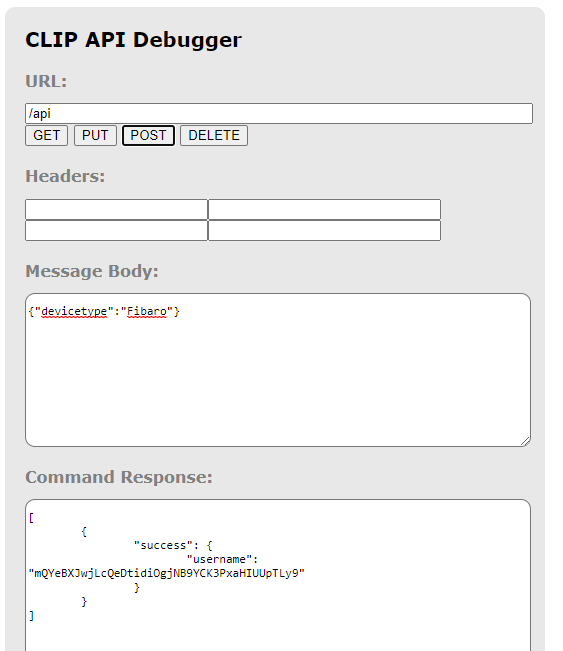
in order to create a user type as URL /api
and in the Message Body
{"devicetype":"Fibaro"}Before hitting the POST button, make sure you press the button on top of your Philips Hue (Link button)
once pressed you can hit the Post button, and you should see as Command response, Success with a username
in case that you see and error (type 101) with a description "link button not pressed" you might have been too quick or too slow :)
Copy the username and keep it safe for now, you will need it later in order to control the Philips Hue Hub trough Fibaro
Test your created User
in order to test this use you can paste the previously created username after the URL /api/
( in my case: /api/mQYeBXJwjLcQeDtidigjNB9YCK3PxaHIDUpTLy9 )
you should see see an complete JSON dump if you press GET (message body: will be ignored with GET)
in the Command Response you should see your complete JSON dump of your Philips Hue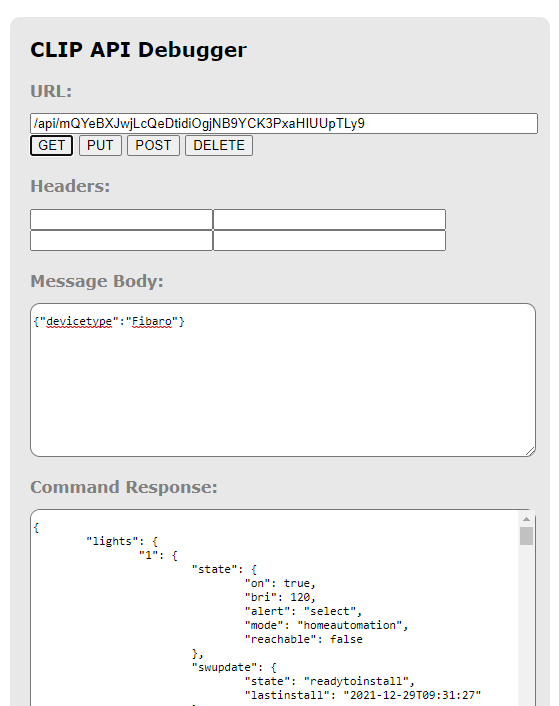
Locating your light ID's
in your Philips CLIP API Debugger type in the URL field /lights after your username
( in my case: /api/mQYeBXJwjLcQeDtidigjNB9YCK3PxaHIDUpTLy9/lights )
and in your Command response you can scroll trough all your lights
in my case I only have 1 light with LightID "1" 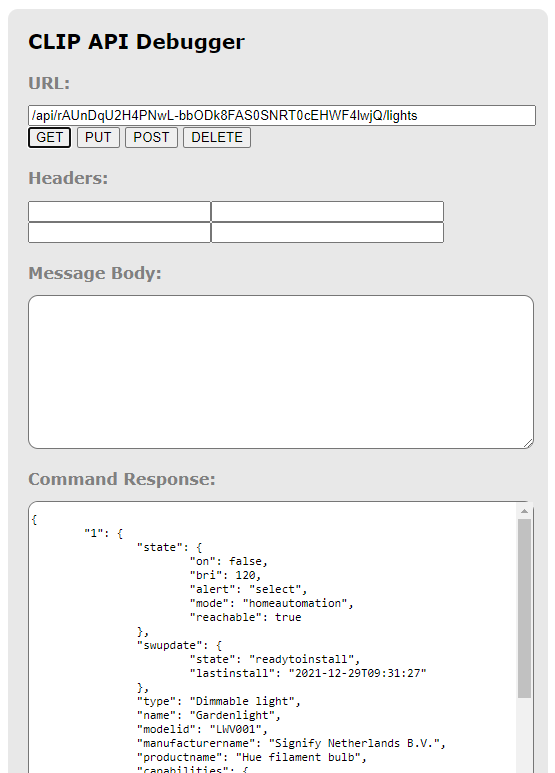
Locating your Sensor ID's
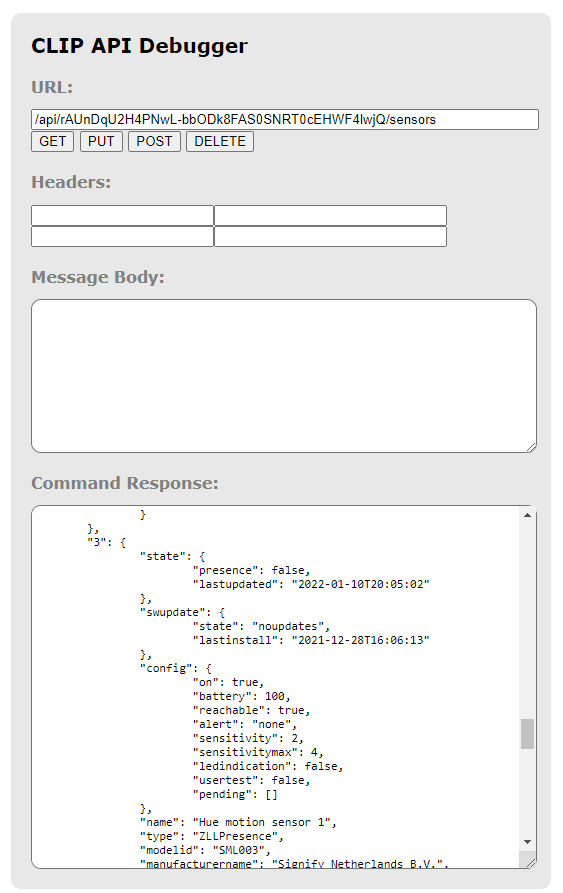
in your Philips CLIP API Debugger type in the URL field /lights after your username
( in my case: /api/mQYeBXJwjLcQeDtidigjNB9YCK3PxaHIDUpTLy9/sensors)
and in your Command response you can scroll trough all your sensors
keep in mind some sensors have more ID's
for example the Philips Hue sensor has a different ID for the temperature and the motion
mostly you can see it with the name value.
Tools for Reading JSON for the Philips Hue Hub
JSON is quite easy to read, if its displayed correctly,
and luckily there are tools for this
web plugin
a good tool for example for reading JSON is jsonview a browser extension for FireFox, Edge and Chrome
the CLIP API Debugger provides some nice overview, but it requires scrolling of the Command response.
another way to get the information (once installed jsonview) is to go to the URL in your browser
( in my case: http://http://192.168.0.10/api/mQYeBXJwjLcQeDtidigjNB9YCK3PxaHIDUpTLy9/lights )
your output should look like the following example:

Windows PowerShell
rather not use a plugin in your browser?
there is another way trough Windows Powershell
Open Windows powershell from your start menu (installed by default in Windows 10 and higher)
and type the following Code (replace the URL to your correct one):
Invoke-RestMethod -Method GET -Uri "http://192.168.0.10/api/rAUnDqU2H4PNwL-bbODk8FAS0SNRT0cEHWF4lwjQ/lights" | ConvertTo-Jsonyou should get an output like this: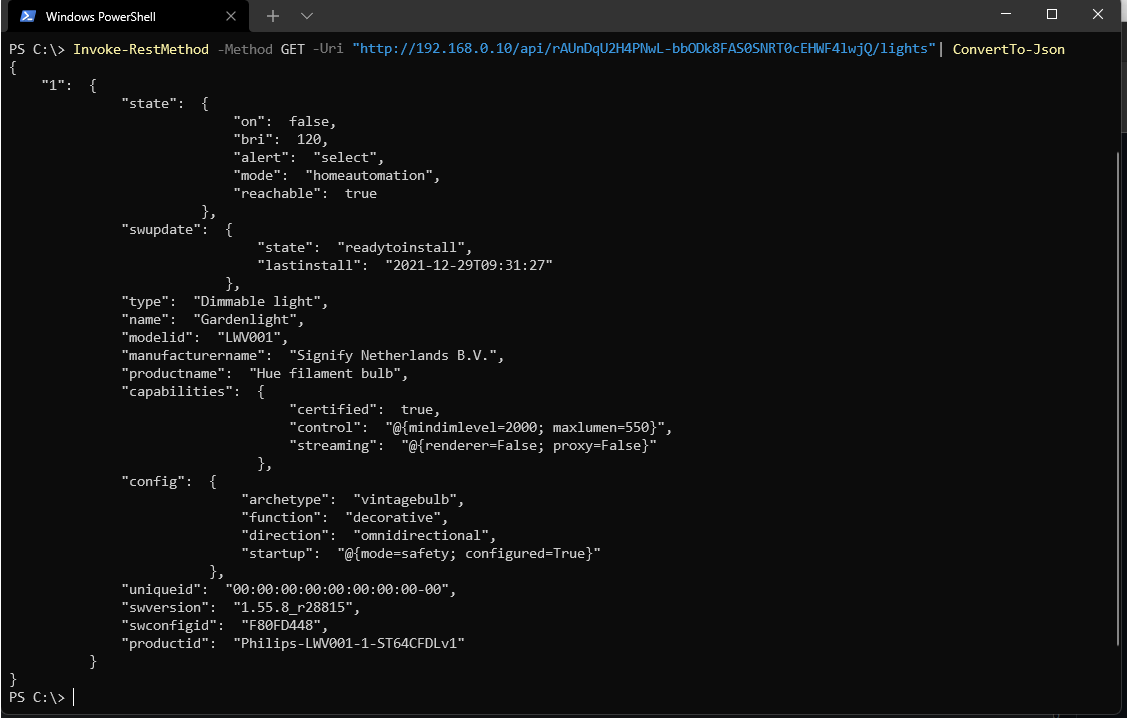
Reading JSON
So now that we are able to get a nice readable view of JSON
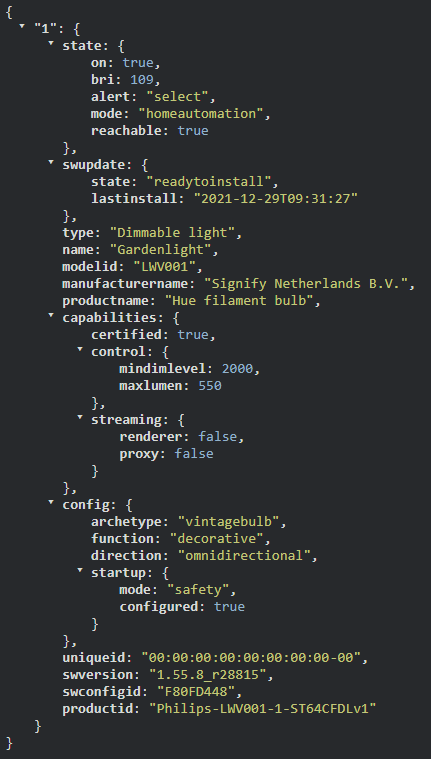
I'll explain how to read the Philips Hue light:
you don't need to know all options
just finding the differences between values
So in the Left side you will see my gardenlight turned on and the right side turned off
you could see this as levels
as you can see is that this light has ID number 1 (level 1)
and some more values, such as state,type,name,productname,capabilities. (level 2)
and some more values as certified (level 3)
etc....
but we are not really interest in all these values.
we just want to control our light, so we are interested in turning it on, off and Diming it
you might have noticed it that we can find an on status under state
on the left side we see on:true , and the right on:false
with playing with the brightness it noticed that the bri value was changing, from range 0 - 255 (min - max)
 |
|
so now we know what values we need to look at or control when we work with JSON
Controlling the light torugh JSON
so now we know how to read the lights, what about controlling them?
This is also possible, but for this we need to submit something to the controller in order to change this,
this can be done with the API Debugger or Windows PowerShell
now that we know how to read JSON, we also know what values will change
for example the on and off state.
so lets to this:
in your Philips CLIP API Debugger type in the URL field /lights after your username
in my case: /api/rAUnDqU2H4PNwL-bbODk8FAS0SNRT0cEHWF4lwjQ/lights/
and click the GET button:
you should see the following
now we have to get to the on value in order to change it
so add the following to the URL field /1/state
1 for the ID, state for the state
in my case: /api/rAUnDqU2H4PNwL-bbODk8FAS0SNRT0cEHWF4lwjQ/lights/1state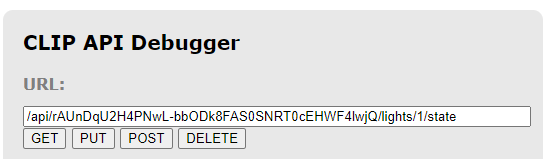
if you would have press GET now you receive an error message, but we are not done yet
in the Message body type the following:
{"on":true}and click the PUT button
you should see in your command response success, meaning that you light should be turned on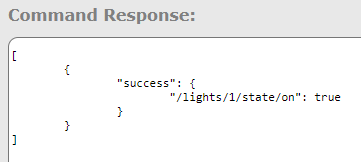
to turn off the light you can change the value from true to false
{"on":false}The same can be done with Windows PowerShell
with the following code:
please note that the Method is PUT now and not GET
and the single quotes and double quotes in the Body
Invoke-RestMethod -Method PUT -Uri "http://192.168.0.10/api/rAUnDqU2H4PNwL-bbODk8FAS0SNRT0cEHWF4lwjQ/lights/1/state" -Body '{"on":false}'
I would say now, try to perform the same steps, but then with the Dimmer feature
the bri value
small tip, the bri values are from 0 - 255, where 0 is off and 255 is full brightness
Good Luck ;-)