Intune - Deploy Paint.net Application
25 November 2021 - Reading time: 8 minutes
So I already created a manual of WinSCP, this one will actually be quite the same,
except for the PowerShell script itself, so If you have followed the WinSCP installation, you can simply replace the PowerShell code, enter the missing parameters (explained) here and the installation will be indentical
and also the result ;)
small side note, these steps worked for my environment, its possible that it might be different for yours,
if you encounter any issues, please let me know so I can improve this manual and help you ;)
Requirements:
- Basic PowerShell knowledge
- Basic batch file knowledge
- Microsoft Win32 Content Prep Tool ( IntuneWinAppUtil.exe )
- Paint.NET ( website )
- Paint.NET logo ( 250x250 ) ( Insentra )
First Steps:
So in order to keep it simple, I actually create 2 folders, named:
- install
- output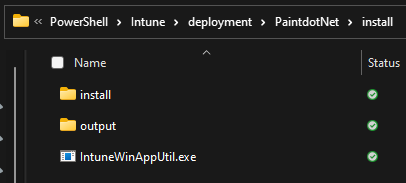
|
place the IntuneWinAppUtil.exe in the root of your created folder Next we will show you what you need to place
|
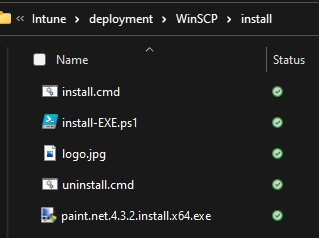 |
Content files:
lets start with the very easy part (where you need your batch skills)
install.cmd
This is actually a one line, used for Intune, since Intune errors out when you want to execute ps1 files.
I wanted to keep this file standard,
so I can use it over all the installation files I have, and the ps1 file is actually the only file I need to adjust.
@Powershell.exe -Executionpolicy bypass -File install-EXE.ps1 -action install
uninstall.cmd
Actually the same for the uninstall file, same as install.cmd with a different action variable.
@Powershell.exe -Executionpolicy bypass -File install-EXE.ps1 -action uninstall
install-EXE.ps1
the important parts of this script are the following variables:
$logFileApplication = ""
Name of the application, this parameter will be used for the logs that the program creates (in case for troubleshooting)
I have used the location: "C:\ProgramData\CustomScripts\LOG"
$Setup_file = ""
the full exe file you placed into the "install" folder
$Setup_parameters = ""
the setup only works in silent mode, so in case of Paint.NET I have found out that if you run the exe file trough the command line with the /? parameter you will see a whole list ( paint.net.4.3.2.install.x64.exe /? )
a full list of parameters can be found here: Paint.NET Documentation
$match = ""
Since this installer doesn't have an uninstaller, I had to find another way,
and since this application can be found under "Add Remove Software" (appwiz.cpl)
we need a way to remove this, so I came up with the following:
if you open your registry Editor (regedit.exe)
and you browse to the following location:
Computer\HKEY_LOCAL_MACHINE\SOFTWARE\Microsoft\Windows\CurrentVersion\Uninstall\
and you check each Key ("folder") until you find paint.net under the String DisplayName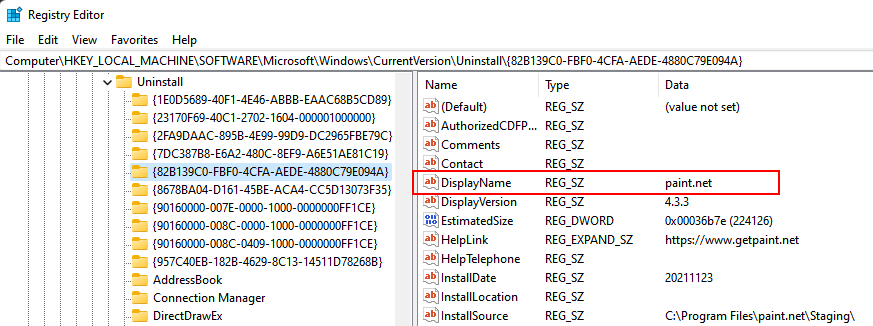
copy this value and place it in the $match = "" parameter in the script
<#
.SYNOPSIS
  Custom script created Creating EXE files.

.DESCRIPTION
  This script will install any application that needs to be deployed troughout Intune


.NOTES
  Author: Rutger Hermarij
  Version 1.0 @ 11-12-2021
  from:   https://scatty.nl/blog

.LINK
  [Rutger's blog]               - https://scatty.nl/blog

.EXAMPLE
  install-EXE.ps1 -action install
.EXAMPLE
  install-EXE.ps1 -action uninstall

#>
param (
  [Parameter(Mandatory)]
  [ValidateSet('install','uninstall')]
  [string]$action
  )

# Variables
# log path and date format for log file
$logPath              = "${env:ProgramData}\CustomScripts\LOG" # path of log file
$dateFormat          =  (Get-Date).ToString('yyyyMMddHHmmss'); # date format for log file
# Name of application, so the log file will look like: Uninstall-<logFileApplication>-20211115121046.log
$logFileApplication   = "PaintNET"

# ${env:ProgramFiles(x86)} = C:\ProgramFiles(x86)\
# ${env:ProgramFiles}      = C:\Program Files\
# ${env:windir}            = c:\windows

$Setup_file           = 'paint.net.4.3.2.install.x64.exe'              # EXE file itself
$Setup_parameters     = '/AUTO'                                        # silent parameters
$match                = "paint.net"  # matching application from the registry


# if it doesn't exit, create it.
if (!(Test-Path $logPath )) {New-Item -Path $logPath -ItemType Directory -Force}

#depending on the provided parameter its installing or uninstalling the application
if($action -eq 'install') {
  # lets Transcript everything, so we know what happens (or not)
  Start-Transcript -Path "$logPath\Install-$logFileApplication-$dateFormat.log"
  Write-Output           "Provided parameters: $action"
  Start-Process -FilePath $Setup_file -ArgumentList $Setup_parameters -Wait
  # stop the Transcript, so we have all details.
  Stop-Transcript
  }
elseif($action -eq 'Uninstall') {
  # lets Transcript everything, so we know what happens (or not)
  Start-Transcript -Path "$logPath\Uninstall-$logFileApplication-$dateFormat.log"
  Write-Output           "Provided parameters: $action"
  #Start-Process -FilePath $uninstall_file -ArgumentList $uninstall_parameters -Wait

  # Lets query the registry for searching for the application

  $application    = @() #empty the PSCustomObject
    #get the UninstallString from the registry
  Get-ChildItem  -Path "HKLM:\SOFTWARE\Microsoft\Windows\CurrentVersion\Uninstall" |
    ForEach-Object {
      $application     += @([PSCustomObject]@{
        PSChildName     = $_.PSChildName
        ItemProperty    = (Get-ItemProperty -Path $_.PSPath) | Select-Object -ExpandProperty DisplayName      -ErrorAction SilentlyContinue
        UninstallString = (Get-ItemProperty -Path $_.PSPath) | Select-Object -ExpandProperty UninstallString  -ErrorAction SilentlyContinue
      }) | Where-Object {$_.ItemProperty -eq $match}
    }

  Write-Output "Current matched installed application"
  Write-Output $application

  # so now that we have a match we have the uninstall string, so we can uninstall
  Write-Output "removing application with $match as matching output"
  Start-Process "${env:windir}\System32\msiexec.exe" -ArgumentList "/X$(($application | Select-Object -ExpandProperty PSChildName)) /qn" -Wait


  # stop the Transcript, so we have all details.
  Stop-Transcript
}
#EOF
What actually happens? (nerd mode)
The batch files is quite simple, they execute PowerShell and run the script.
The PowerShell script, checks the parameters that are provided (install or uninstall)
install parameter provided (install.cmd)
start creating log files under C:\ProgramData\CustomScripts\LOG ), handy for troubleshooting
starts the installer ($Setup_file) with the parameters provided ($Setup_parameters)
stop creating log files.
done.
uninstall parameter provided (uninstall.cmd)
start creating log files under C:\ProgramData\CustomScripts\LOG ), handy for troubleshooting
Reads the following registry key:
Computer\HKEY_LOCAL_MACHINE\SOFTWARE\Microsoft\Windows\CurrentVersion\Uninstall
loops over each Key until it find a match ($match)
uses the Key name in order to run the application msiexec.exe with the following parameters: /X {registrykey}
stop creating log files.
done.
Testing:
for testing you can simply try to run the batch files,
if everything goes well, you should have 1 log file in your "C:\ProgramData\CustomScripts\LOG" folder
and you should have the application installed on your machine without any popups
and the same would happen for uninstalling the application.
if you have any issues you can check the logs for details (PowerShell would show error messages there)
Creating a intunewin file for Intune
browse to the root folder we have created in beginning of the the manual
and type the following:
.\IntuneWinAppUtil.exe -c ".\install" -s "install-EXE.ps1" -o ".\output"you will see a simular output as this, most important part is the Done at the end
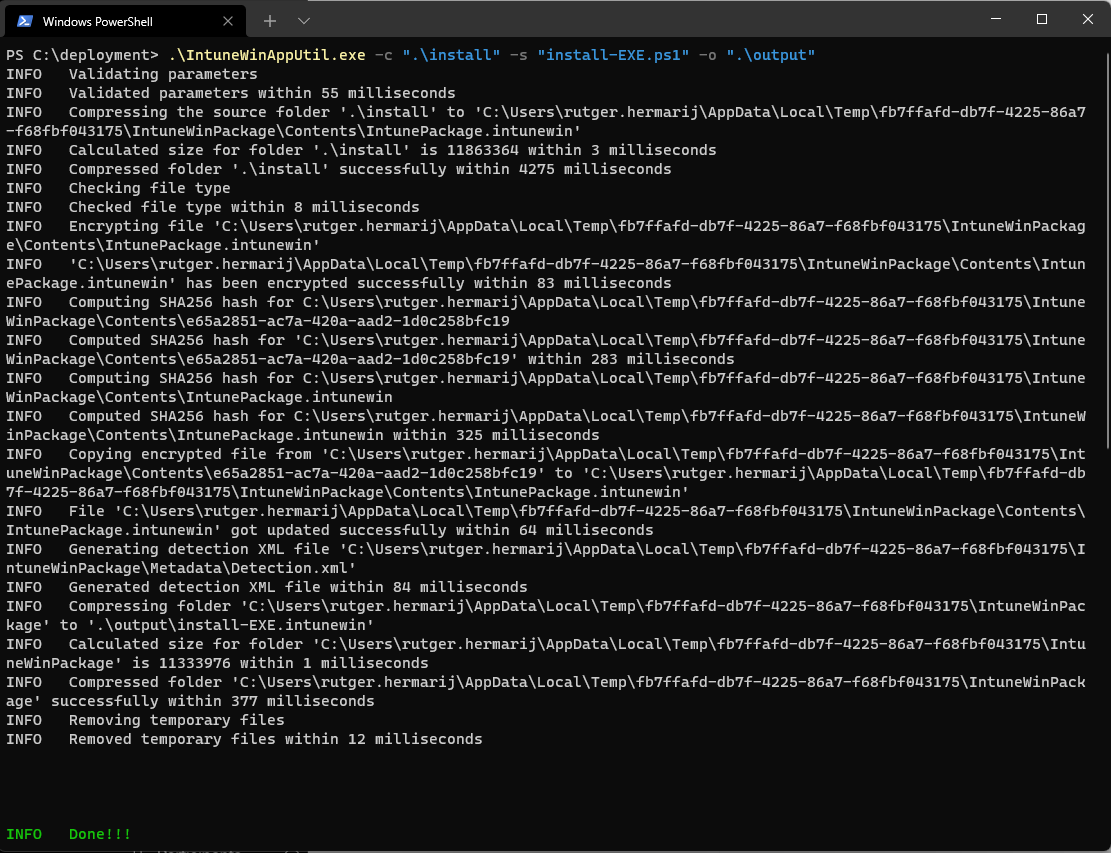
if its correct you should now have an install-EXE.intunewin file in your output folder,
I would recommend to rename this to PaintNET.intunewin since this name will be visible in intune itself.
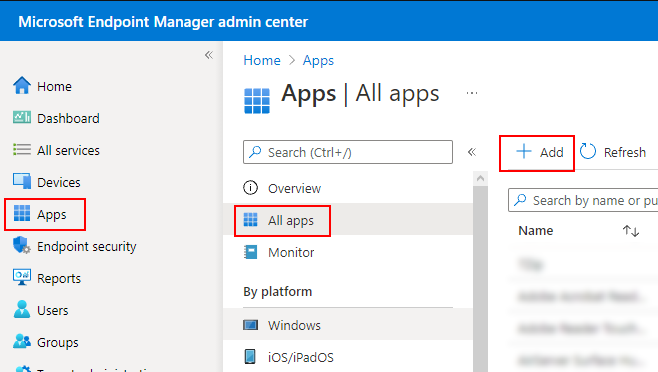
Adding a new application in intune
browse to https://endpoint.microsoft.com, select Apps, All Apps and click the Add button
as App type, select Windows app (Win32)
you will see a wizzard with 6 steps
App information
select app package file, this is your intunewin file you just created in your output folder.
once selected, you will see some more information, for this application you can type the following:
| Name: | Paint.NET |
| Description: | Paint.NET is free image and photo editing software for PCs that run Windows. It features an intuitive and innovative user interface with support for layers, unlimited undo, special effects, and a wide variety of useful and powerful tools. |
| Publisher | dotPDN LLC |
| App Version | 4.3.2 |
| Category | <Select where you think it fits best, for example Design> |
| Show this as a featured app in the Company Portal | <you want this app as featured in company portal?> |
| Information URL | https://www.getpaint.net/features.html |
| Privacy URL | https://www.getpaint.net/privacy.html |
| Developer | dotPDN LLC |
| Owner | the person responsible in your business |
| Notes | Notes, for example change number |
| Logo | upload the Paint.NET picture here from the requirements |
Program
here we will use the installation commands in order to install the application successfully
| Install command | install.cmd |
| uninstall command | uninstall.cmd |
| install behavior | SYSTEM |
the rest you can keep as default
Requirements
Here you can enter the system requirements, this is actually depending on your environment
here are the parameters I entered for WinSCP
| Operating system architecture | 64-bit |
| Minumum operating system | Windows 10 21H1 |
| Disk space required (MB) | 500 |
| Physical memory required (MB) | 2048 |
and the rest I kept default
Detection Rules
This is is actually quite important,
if this is incorrect, the deployment will says it failed because it is unable to detect if the application is actually installed.
here are my values for WinSCP
| Rule format | Manually configure detection rules |
| Rule type | File |
| Path | %ProgramFiles%\paint.net |
| File or folder | paintdotnet.exe |
| Detection method | File or Folder exists |
| Associated with a 32-bit app on 64-bit client | No |
Dependencies
I left this one empty
Supersedence (preview)
I left this one empty
Assignments
Depending on your wishes, if you want to force install this application or make it available for "All users" to install it by themselves trough the company portal
and that's basically it. you might not see the application instantly,
you might need to re-Sync in order to get the latest updates from your organisation (under Settings)
click install and enjoy your deployed application.