Intune - Installing on-prem printers
26 November 2021 - Reading time: 2 minutes
If you still have an on-prem environment in combination with Azure Active directory,
this is a perfect solution for adding the printers on your client machines.
Requirements:
- Basic PowerShell knowledge
- Admin Permissions on local machine
- On-prem groups Synced with AzureAD / Dynamic groups in AzureAD
First Steps:
Make sure you have created on-prem Group or (Dynamic) group in AzureAD where you are able to assign the users to.
Create a PowerShell script (ps1) file with the following content:
enter the on-prem servername under the variable $ServerName = ""
(in this example I have NLD-PRNT-SRV01-PRD.europe.local)
and name the print Queue under $OfficeName = ""
<#
.SYNOPSIS
Printers.ps1 - Simply adds a kyocera printer named after the office location

.DESCRIPTION
once executed it will add the printer under printers so the person is able to print from this printer
since it uses a legacy AD server it needs to have access to this server. ($serverName)


.OUTPUTS
ps1 file in customscripts

.NOTES
Author     : Rutger Hermarij
version    : 1.0 @ 25-02-2020
from       : https://scatty.nl/blog

#>
$ServerName = "NLD-PRNT-SRV01-PRD.europe.local" # on prem print server (FQDN)

#$OfficeName = "AUS-MEL-OF"  # Australia    Melbourne   Office
#$OfficeName = "NLD-AMS-HQ"  # Netherlands  Amsterdam   Headquarters
$OfficeName = "NDK-CPH-SO"  # Denmark      Copenhagen  Sales Office
#$OfficeName = "PHL-CEB-DC"  # Philippines  Cebu        Distribution Center


# define your PS script here
$content = @"
Add-Printer -ConnectionName "\\$ServerName\$OfficeName"
"@


# create custom folder and write PS script
$path = $(Join-Path $env:ProgramData CustomScripts)
if (!(Test-Path $path))
{
New-Item -Path $path -ItemType Directory -Force -Confirm:$false
}
Out-File -FilePath $(Join-Path $path \$OfficeName-Printers.ps1) -Encoding unicode -Force -InputObject $content -Confirm:$false
What will actually happen?
once this script runs it creates a file PowerShell File (ps1) under C:\Programdata\Customscripts\ named after the $OfficeName
and it will try to add the printer with the given name
and in combination with the login-script it will run every time when the computer starts
Adding the script into Intune
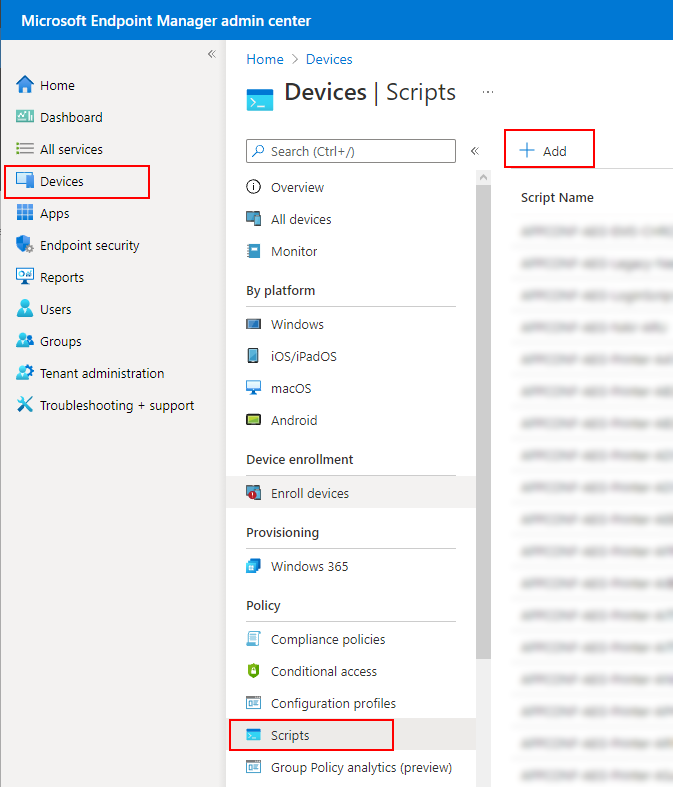
browse to https://endpoint.microsoft.com, select Devices , Scripts and click the Add button, Select Windows 10 and later

You will see a wizzard with 4 steps
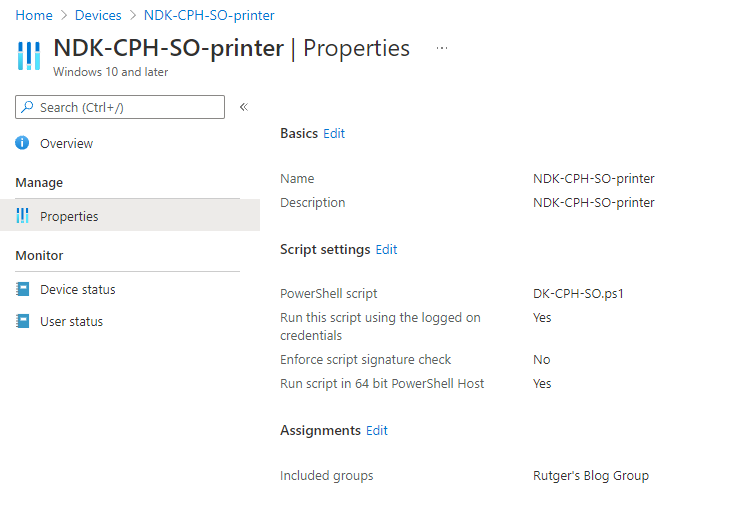
Basics
| Name | NDK-CPH-SO-printer |
| Description | Printer script for adding the Printer in our Copenhagen office |
Script settings
| Script Location | <location of your created ps1 file> |
| Run this script using the logged on credentials | Yes |
| Enforce Script signiture check | No |
| Run script in 64 bit PowerShell Host | Yes |
Assignments
Select the groups that actually need this script to run, for example a Dynamic group for the NDK-CPH-SO office
Review + add
overview of your just created script
if its correct you should see your just created script in your overview,
if you click on it you will see your deployment status.

Once successfully synced you should see in Intune in the overview page if its successfull,
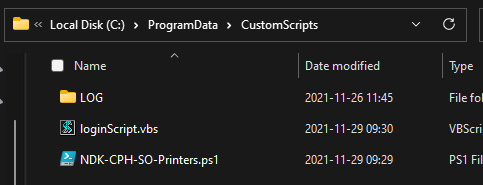
and on the client's computer you should see an file under C:\ProgramData\CustomScripts
in combination with the login script, this script will be executed every time the person logs on with his computer